Thread Before and After Plating (Part 2)

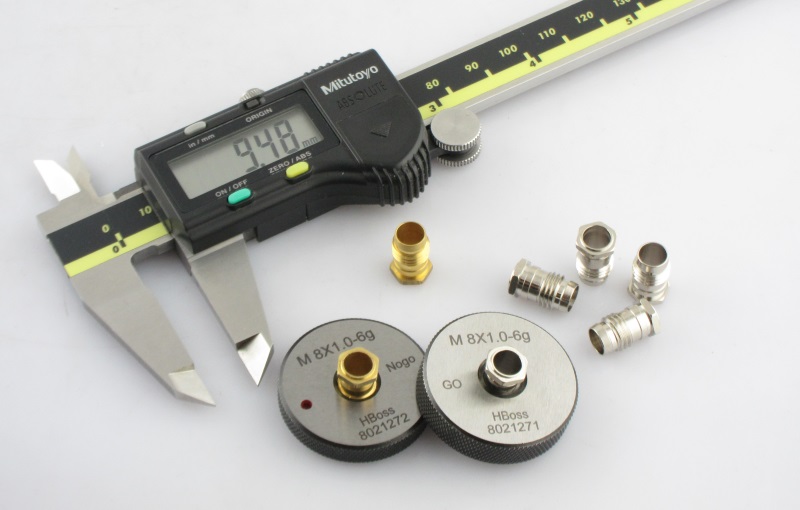
To use NO GO of the standard thread gauge for the inspection criterion for threads before plating.
After plating, the threads have to pass the standard thread gauge inspections.
How to Control the Thread Size Before Plating ?
As it is mentioned previously, the goal of OD control can be easily reached under stable CNC processing. Generally, after CNC processing, the threads of a non-plated component have to pass the thread gauge inspection so as to pass the QC inspection. Nevertheless, for components that need to undergo plating process, the manufacturing and inspection procedures will be different from the former. According to the requirement of our Swiss dental equipment supplier client, APPORO has to be discreet than ever for inspections. See the examples below:
Based on the required plating film thickness, APPORO has to leave some room for it during CNC processing, and use the pre-plated thread gauges for inspections. See the photo below. If the required plating film thickness is 1-3um, the major, pitch, and minor diameters should all be +0.02/-0mm larger than the standard dimensions when manufacturing the internal thread M13.2x0.3-6H. Then, the threads need to pass the inspections of the enlarged customized M13.2x0.3-6H +0.02/-0mm plug gauge before plating. After plating, the internal threads need to pass the inspections of a standard M13.2x0.3-6H plug gauge. Once they pass the inspection, they can be approved for shipment. If there is an external thread on the plated component, after CNC processing, the pre-plated ring gauge inspection will be necessary. And then, the inspection of a standard ring gauge should then be conducted.
What we can do without pre-plated gauges ?
However, the customized pre-plated plug/ring gauges are all expensive, which are only needed for components that demand extremely high precision, but not for all components. With the long time CNC manufacturing experience, APPORO suggests to use NO GO of the standard thread gauge for the inspection criterion for threads before plating. That is, the threads could perfectly screw in the NO GO of the standard thread gauge without loosing. After plating, the threads have to pass the standard thread gauge inspections, a.k.a. GO and NO GO inspections.
This inspection is more available for components with plating film under 5um thickness. For components with plating film over 5um thickness, as its plating is for anti-corrosion purpose, and the precision requirement of it is usually lower. Even the ready made standard screws and nuts can be the inspection tools. Or, before plating the threads should be able to screw in the NO GO of the standard thread gauge but slightly loose. And then, the threads should pass the GO and NO GO inspections after plating.
Plating and thread making are common techniques when speaking of CNC manufacturing components. Before and after different procedures, the concern will also be different. APPORO has devoted long time and and much efforts to CNC machining services, systematically learning from the processing experience in this field and turning it into application to increase the manufacturing efficiency and yield rates. Should you have any technical questions relevant to controlling size before/after plating, do not hesitate to contact us.


